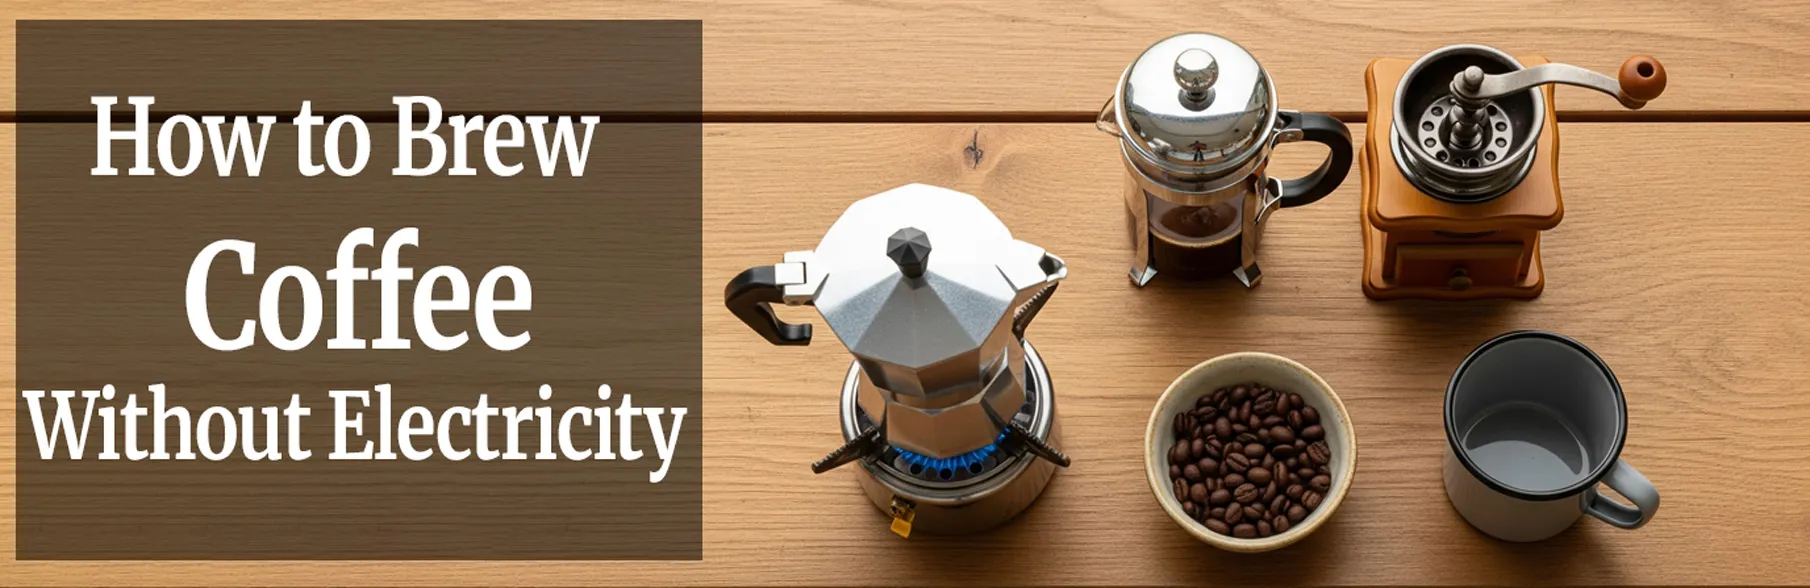
Quick pick by situation
- Power outage at home: French press if you have one, cowboy coffee if you don’t (gas stove or grill).
- Car camping: Moka pot on a propane burner. Closest to espresso, easy cleanup.
- Backpacking: Pour-over with paper or reusable filter. Lightest setup.
- Group camping or events: Stovetop percolator on a propane burner or campfire. Makes 8-12 cups at once.
- No heat source at all: Cold brew made the night before, or steeped overnight with cold water and a filter.
- Traditional and impressive: Turkish coffee on a single burner with finely ground beans.
For pre-built non-electric coffee makers worth keeping in the cupboard, see our companion roundup of coffee makers that use no electricity.
The power went out at 5 AM during an ice storm, and my first thought wasn’t about the food in the fridge or whether the heat would come back on – it was pure panic about how I’d make coffee. My electric grinder was useless, my programmable coffee maker was just an expensive paperweight, and even my electric kettle couldn’t help. That’s when I remembered my grandmother’s words: “People made coffee for centuries before electricity, and they weren’t walking around like zombies.”
She was right, of course. That morning, I made some of the best coffee I’d had in months using nothing but a saucepan and a kitchen strainer. It got me thinking about all the times we might need to brew coffee without electricity – camping trips, power outages, travel to remote places, or just wanting to simplify our morning routine.
These methods aren’t just emergency backup plans. Many of them produce coffee that’s actually better than what most electric machines manage. Plus, there’s something deeply satisfying about making great coffee with your hands and basic tools.
The Essentials: What You Need
Before diving into specific methods, let’s cover the basics. Every non-electric brewing method needs three things: heat source, coffee grounds, and water. The heat source can be a gas stove, campfire, camping stove, or even a candle (though that takes forever). For coffee grounds, you’ll need to either buy pre-ground coffee or have a manual grinder – a mortar and pestle works in emergencies, though it’s quite the workout.
Pro tip: If you’re planning for power outages or camping, invest in a manual coffee grinder. They’re not expensive, and freshly ground coffee makes a huge difference in any brewing method.
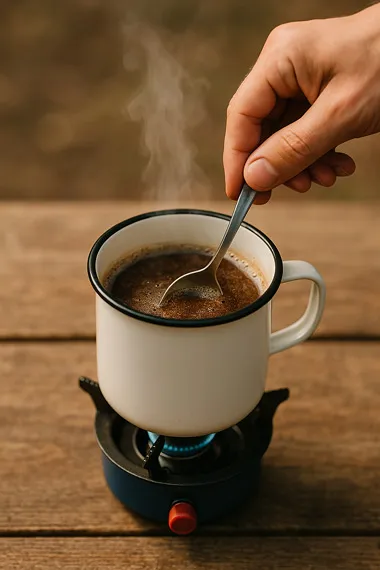
Method 1: Cowboy Coffee (Easiest)
This is the most basic method, requiring nothing more than a pot and heat source. Despite the rough name, cowboy coffee can be surprisingly good when done properly.
What you need: Pot, coarse ground coffee, water
How to do it:
- Bring water to a boil – about 6 oz per cup of coffee
- Remove from heat and add coffee grounds – 2 tablespoons per cup
- Stir once and let sit for 4 minutes
- Add a splash of cold water to settle the grounds
- Pour carefully, leaving sediment behind
The secret: That splash of cold water at the end makes grounds sink faster, giving you cleaner coffee. Don’t skip this step.
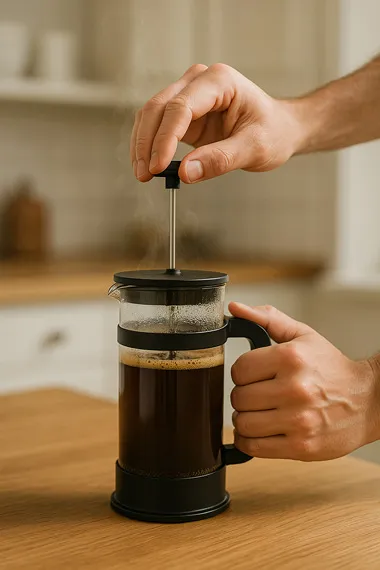
Method 2: French Press (Most Reliable)
A French press doesn’t need electricity, just hot water. It’s probably the most foolproof method for consistently good coffee without power.
What you need: French press, coarse ground coffee, hot water
How to do it:
- Heat water to just off boiling (if it’s violently bubbling, let it sit 30 seconds)
- Add coffee grounds – 1 ounce per 15 ounces of water
- Pour hot water, stir once, put lid on (plunger up)
- Wait 4 minutes exactly
- Press plunger down slowly and pour immediately
Why it works: The metal filter allows coffee oils through, creating rich, full-bodied coffee. It’s nearly impossible to mess up.
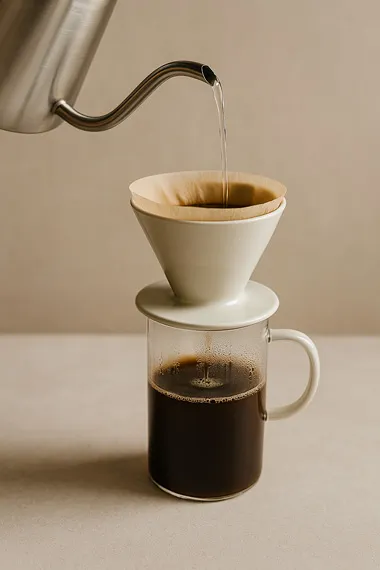
Method 3: Pour-Over (Best Flavor)
Manual pour-over coffee often tastes better than electric drip makers because you control every variable. All you need is a cone dripper and filters.
What you need: Pour-over dripper (V60, Chemex, or Melitta), paper filters, gooseneck kettle or steady pouring vessel
How to do it:
- Heat water to 200°F (just off boiling)
- Rinse filter and warm dripper with hot water
- Add medium-fine ground coffee – about 1:16 ratio
- Pour just enough water to wet grounds (bloom for 30 seconds)
- Pour slowly in circular motions until you reach desired amount
The technique: Pour slowly and steadily. The whole process should take 3-4 minutes. Fast pouring leads to uneven extraction.
Method 4: Moka Pot (Closest to Espresso)
The moka pot uses steam pressure to force water through coffee grounds, creating concentrated coffee similar to espresso. It’s completely stovetop-operated.
What you need: Moka pot, fine ground coffee, water
How to do it:
- Fill bottom chamber with water to just below safety valve
- Fill filter basket with coffee – level but don’t pack down
- Assemble pot and place on medium heat
- Listen for bubbling sounds – remove when you hear sputtering
- Serve immediately or dilute with hot water for Americano-style coffee
Important: Don’t let it “percolate” on heat after coffee starts coming out. This overcooks the coffee and makes it bitter.
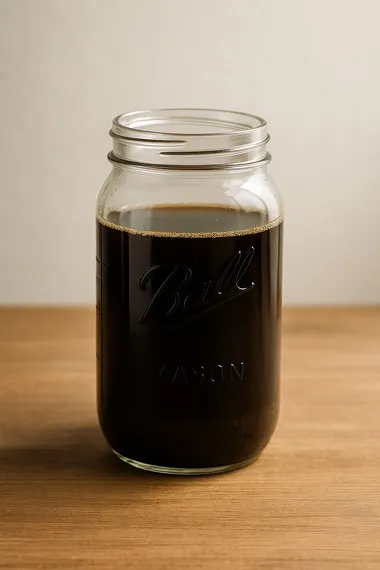
Method 5: Cold Brew Concentrate (No Heat Required)
This is the only method that needs zero heat – perfect when you have no way to heat water but still want coffee.
What you need: Large jar, coarse ground coffee, cold water, strainer
How to do it:
- Mix 1 cup coarse coffee grounds with 4 cups cold water in large jar
- Stir well, cover, and wait 12-24 hours at room temperature
- Strain through fine mesh or cloth – strain twice for clarity
- Mix concentrate 1:1 with hot water for hot coffee, or serve over ice
Planning ahead: Make this before your camping trip or when you know bad weather is coming. The concentrate keeps for a week refrigerated.
Method 6: Turkish Coffee (Most Traditional)
This ancient method creates thick, rich coffee that’s more like a coffee experience than just a drink. You’ll need very finely ground coffee – almost powder.
What you need: Small pot (ibrik if you have one), very fine ground coffee, sugar (optional)
How to do it:
- Combine 1 cup water, 1 tablespoon very fine coffee, and sugar if desired in small pot
- Heat slowly over low heat – don’t rush this
- Watch for foam forming – remove from heat when foam appears
- Return to heat and repeat foaming 2-3 times
- Pour immediately, including the foam
Cultural note: Traditionally served in small cups because it’s very strong. The grounds settle at the bottom – don’t drink the last sip.
Method 7: Improvised Stovetop Drip
When you have ground coffee but no specialized equipment, you can create a makeshift drip system using kitchen items.
What you need: Large pot, smaller heat-proof container, clean cloth or fine strainer
How to do it:
- Place smaller container inside larger pot (it should sit above water level)
- Add water to large pot around smaller container
- Put coffee grounds in cloth or strainer over smaller container
- Heat until water steams – steam condenses and drips through coffee
- Be patient – this method is slow but works
Reality check: This is more of an emergency technique. It works, but requires patience and produces small amounts of coffee.
Method 8: Stovetop Percolator (Best for Groups)
The classic camping coffee method, and the most-overlooked option on this list. A stovetop percolator works on any heat source: a campfire, a propane stove, a wood stove, a gas burner. No electricity, no batteries, no consumables besides ground coffee. The 8-cup and 12-cup stainless steel percolators that have been on the market for decades are essentially indestructible and produce strong, hot coffee for a small group with about ten minutes of attention.
What you need: Stovetop coffee percolator (4 to 12 cup capacity), coarse-ground coffee, heat source
How to do it:
- Disassemble the percolator. Fill the pot with water up to just below where the basket sits.
- Add coarse coffee grounds to the basket – about 1 heaping tablespoon per cup of water. Coarse grind matters; drip-grind coffee will produce muddy, bitter results.
- Reassemble and place over medium-high heat until you see the first splurt of coffee through the glass bubble in the lid.
- Drop heat to low and let it perk for 4 to 8 minutes. Start checking at 4. Stop sooner if the coffee through the bubble looks dark enough.
- Pull the percolator off the heat AND remove the entire filter stem (not just the basket). This is the step that ruins percolator coffee when skipped – leaving the stem in place lets steam keep dripping through the spent grounds and turns the cup bitter fast.
Reality check: The classic small-group method. Sturdier than every other no-power option on this list, lasts decades, and makes legitimately good coffee when you respect the timing. The full technique, including the troubleshooting most articles skip, is in our guide to making perfect percolator coffee. For groups larger than 12, a large-capacity coffee urn (also a percolator design at heart) handles up to 100 cups for events.
Tips for Better Non-Electric Coffee
Water quality matters just as much without electricity. If your tap water tastes bad, your coffee will too. Use filtered or bottled water when possible.
Grind size is crucial. Coarse grinds for immersion methods (French press, cowboy coffee), fine grinds for pressure methods (moka pot), medium for pour-over. Wrong grind size ruins even perfect technique.
Temperature control without a thermometer: Water just off boiling is perfect for most methods. If you see violent bubbling, remove from heat and wait 30 seconds.
Pre-warm your equipment when possible. Rinse your French press or pour-over setup with hot water before brewing to maintain temperature.
Practice before you need it. Try these methods when you have power so you know what works when you actually need the backup plan.
What About Grinding Without Electricity?
If you only have whole beans, you have options:
Manual coffee grinder – Worth buying if you camp or live in an area with frequent power outages
Mortar and pestle – Hard work but effective for small amounts
Rolling pin method – Put beans in a bag and crush with rolling pin (see our Coffee Kitchen Hacks guide for details)
Hammer technique – Bag the beans and tap gently with hammer – louder but faster than rolling pin
Frequently asked questions
What’s the easiest way to make coffee during a power outage?
If you have a French press, that’s the easiest. Boil water on a gas stove or grill, pour over coarse grounds in the press, plunge after four minutes. No power needed, no special technique. If you don’t have a press, cowboy coffee (grounds in a pot of near-boiling water, wait for them to sink) works with any vessel and any heat source.
Can I make coffee without any heat source at all?
Yes, with cold brew. Combine coarse grounds and cold water at a 1:4 ratio in any container, let steep 12 to 18 hours, strain. The result is concentrated coffee that you can dilute with more cold water or drink straight as a stronger shot. The trade-off is the long wait. If a power outage is sudden, set up cold brew first thing so it’s ready by the next morning. See our cold brew guide for the full method.
Will pre-ground coffee work for these methods?
Yes, but the grind size matters. Pre-ground “drip” coffee works for pour-over and cowboy coffee. It is too fine for French press (you will get sludge) and too coarse for moka pot or Turkish coffee. If you keep a single tub of pre-ground for emergencies, get medium-coarse grind and accept that it is a compromise for some methods.
How much coffee should I keep stockpiled for emergencies?
Two pounds of vacuum-sealed whole-bean coffee plus a small manual grinder covers a household of two for about a month of daily coffee. Whole beans stay fresh roughly six months unopened; pre-ground starts losing flavor within two weeks. For longer-term storage, consider vacuum-sealing in smaller bags and keeping them in the freezer.
Can I use a Keurig pod without power?
Yes, if you boil water separately. Cut the foil top off the pod, place it in a mug, pour boiling water through slowly, let it steep for 30 seconds, then remove. The result is closer to weak drip coffee than a normal Keurig shot, but it works.
How do I keep coffee hot without a warming plate?
An insulated thermos holds coffee at serving temperature for 6 to 12 hours depending on quality. Pre-warm the thermos with boiling water first, dump that water out, then fill with fresh-brewed coffee. A vacuum-insulated stainless steel thermos easily outperforms any electric warming plate, which usually overheats coffee and makes it taste burnt.
The Bottom Line
Making coffee without electricity isn’t just about emergency preparedness – it’s about understanding that great coffee doesn’t require expensive machines. Some of my most memorable cups have come from these simple methods, whether around a campfire, during a power outage, or just experimenting on a quiet morning.
The key is choosing the right method for your situation. French press for reliability, pour-over for best flavor, moka pot for strong coffee, cold brew for advance preparation, and cowboy coffee when you literally have nothing but a pot and heat source.
Don’t wait for an emergency to try these techniques. Pick one that appeals to you and experiment this weekend. You might discover that your “backup” method actually makes better coffee than your electric machine ever did.
Besides, there’s something deeply satisfying about making great coffee with nothing but fire, water, and coffee grounds – the way it was done for centuries before we had machines to do everything for us.
Discussion 3
“Put about 1/2 cup of ground coffee in one jar. Add about 1/2 cup of ground coffee.” … what ? how much coffee ? 1/2 cup … 1 cup ??
@ Lori — I think that’s called an Aeropress.
I once found a coffee maker in a shop and now cannot find it anywhere. It was a clear plastice, non electric item, it looked like you placed a cone filter inside, added hot water, waited and then instead of a press you simply pushed a leaver and it would passively drip out the bottom into your cup. Do you know what this might be called?