Affiliate disclosure: As an Amazon Associate, TalkAboutCoffee earns from qualifying purchases. Our picks are based on editorial judgment, not commission rates.
Quick picks
- Roast: medium-dark to dark. Light roasts go bitter and harsh in percolators.
- Origin: Brazilian, Sumatran, and other low-acid regions outperform bright African beans here.
- Grind: coarse, like sea salt. Anything finer turns muddy.
- Budget-friendly that works: Yuban Original, Folgers Classic Dark, Maxwell House dark roast.
- Premium worth the money: Peet’s Major Dickason’s Blend, Cafe Bustelo (for stronger profile), Lavazza Super Crema.
- Whole bean vs pre-ground: whole bean wins on freshness, but pre-ground works fine if labeled “percolator” or “coarse.”
If you’re new to the method, start with our guide to making percolator coffee. If your current coffee tastes wrong, see troubleshooting common percolator problems.
Here’s something most coffee guides won’t tell you: not all coffee beans are created equal when it comes to percolation. While the coffee snobs are busy debating the terroir of single-origin beans and perfect extraction temperatures, they’re completely missing the fact that some beans just work better in percolators than others.
Buying around Prime Day? Bagged coffee rarely sees deep Prime Day cuts, but Cafe Bustelo, Lavazza, and the big dark roasts do show up in subscribe-and-save and multipack deals. Amazon Prime Day runs June 23 to 26 this year if you want to stock up.
I spent way too much money learning this lesson the hard way, buying expensive light-roast beans that turned into bitter, undrinkable messes in my percolator, while cheaper dark roasts produced surprisingly good coffee. It turns out there’s actual science behind why certain beans thrive in the high-heat, longer extraction environment of percolation.
Why Bean Choice Matters More for Percolators
Percolation is a more aggressive brewing method than pour-over or French press. The water gets hotter, the extraction time is longer, and that coffee gets cycled through the grounds multiple times. This means characteristics that might be delicate and pleasant in gentler brewing methods can become harsh and overwhelming in a percolator.
Think of it like the difference between simmering vegetables and throwing them on a hot grill. Some flavors get better with aggressive treatment, while others get completely destroyed. Coffee beans are the same way.
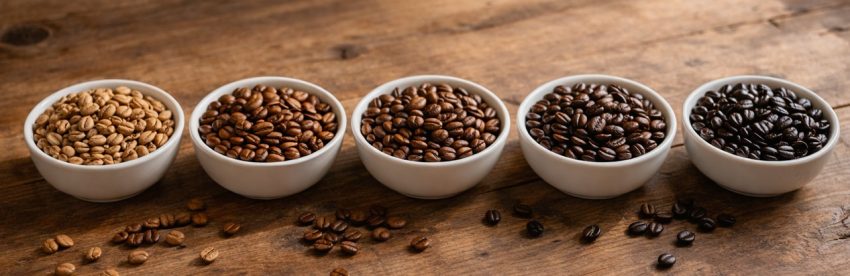
Roast Level: Why Darker Usually Wins
Medium to dark roasts are your best bet for percolators. I know this goes against the current coffee trend of lighter roasts that preserve “origin characteristics,” but hear me out.
Dark roasting breaks down some of the acids and compounds that can turn bitter with extended extraction. The roasting process essentially pre-breaks-down some of the elements that percolation would over-extract anyway. It’s like the beans are pre-adapted to handle the aggressive brewing method.
French roast and Italian roast coffees are particularly good in percolators. The bold, rich flavors hold up well to the strong extraction, and the lower acidity means less chance of that sharp, unpleasant bite that kills percolated coffee.
Medium roasts can work well too, especially if they’re from naturally low-acid origins. Look for beans described as “smooth,” “balanced,” or “low-acid” rather than “bright,” “vibrant,” or “complex.”
Light roasts are usually a disaster in percolators. All those delicate floral and fruity notes that light-roast enthusiasts love? They turn into harsh, sour, over-extracted nastiness when put through the percolation process. Save your expensive light-roast single-origins for pour-over and French press.
Origin Matters: Low-Acid Regions Rule
Geography plays a big role in how coffee beans handle percolation. Beans from certain regions are naturally lower in acid, which makes them much more forgiving when subjected to longer extraction times.
Brazilian coffees are excellent for percolators. They’re typically smooth, nutty, and low in acid, with enough body to stand up to aggressive brewing. Brazil produces more coffee than anywhere else in the world, so you’ll find plenty of options at reasonable prices.
Sumatran and Indonesian coffees are another great choice. They tend to be earthy, full-bodied, and naturally low in acidity. The processing methods used in these regions often produce beans that actually benefit from the longer extraction time of percolation.
Central American coffees (Guatemala, Nicaragua, Honduras) can work well if you stick to darker roasts. These regions produce coffees with good body and chocolate/nutty flavor profiles that complement percolation.
Avoid high-altitude African coffees like Kenyan or Ethiopian beans, at least until you’ve mastered percolator technique. These are typically bright, acidic, and complex. Exactly the characteristics that turn unpleasant with over-extraction.
Processing Method: What to Look For
The way coffee is processed after harvesting affects how it handles different brewing methods. For percolators, you want to look for:
Dry-processed (natural) coffees tend to be less acidic and more forgiving in percolators. The beans are dried with the cherry still attached, which creates different flavor compounds than wet-processing.
Semi-washed or honey-processed coffees can work well too, offering a middle ground between the fruity complexity of washed coffees and the smooth simplicity of natural process.
Avoid strictly washed/wet-processed coffees from high-acid regions, especially in lighter roasts. The clean, bright characteristics that make these coffees excellent for other brewing methods can turn harsh in percolators.
Specific Recommendations That Work
Dark Roast Winners
- French Roast blends from major roasters (Peet’s, Starbucks French Roast works surprisingly well in percolators)
- Italian Roast from any reputable roaster
- Sumatra Dark Roast (Starbucks makes a good one)
Medium Roast Options
- Brazilian Santos medium roast
- Guatemala Antigua medium-dark
- Colombian Supremo (stick to medium-dark versions)
Budget-Friendly That Don’t Suck
- Folgers Black Silk (yeah, I said it. It’s actually decent in percolators)
- Eight O’Clock Coffee Dark Italian Roast
- Community Coffee Dark Roast (if you can find it)
Premium Worth the Money
- Peet’s Major Dickason’s Blend
- Green Mountain Coffee Dark Magic
- Death Wish Coffee (if you want maximum caffeine)
What About Pre-Ground vs. Whole Bean?
Whole bean is always better if you can grind it yourself. Fresh-ground coffee makes a noticeable difference in any brewing method, and percolators are no exception. Plus, you can control the grind size, which is crucial for good percolated coffee.
If you must buy pre-ground, look for coffee specifically labeled as “coarse grind” or “percolator grind.” Most regular ground coffee is too fine and will give you muddy, over-extracted results.
Avoid anything labeled as “espresso grind” or “fine grind.” It will turn your percolator coffee into bitter sludge.
Grind Size: The Critical Factor
This is crucial and often overlooked. Your grind should look like coarse sea salt or rough breadcrumbs. Too fine and you’ll get muddy, bitter coffee. Too coarse and the water will flow through without extracting enough flavor.
If you’re grinding your own beans, aim for a setting similar to what you’d use for French press, maybe slightly finer. Most burr grinders have a “percolator” setting that works well.
What to Avoid
Light roast single-origins from high-acid regions. These are beautiful coffees that deserve better than percolation. Save them for pour-over or cold brew where their delicate characteristics can shine.
Flavored coffees can be tricky in percolators because the extended extraction can make artificial flavoring oils taste harsh or chemical. If you like flavored coffee, add flavoring after brewing rather than using pre-flavored beans.
Super-premium specialty coffees are usually wasted in percolators. The aggressive brewing method will mask the subtle characteristics you’re paying extra for.
Storage and Freshness
Coffee beans go stale faster than most people realize, and stale coffee is even worse in percolators than in other brewing methods. The longer extraction time pulls out all the unpleasant flavors that develop as coffee ages.
Buy in smaller quantities and use within 2-3 weeks of the roast date if possible. Store beans in an airtight container away from light and heat. Don’t refrigerate or freeze them. It causes more problems than it solves.
Budget vs Premium Reality
Here’s where percolators actually have an advantage over other brewing methods: you don’t need to spend a fortune on premium beans to get good results. The percolation process is forgiving enough that a well-chosen medium-priced coffee often tastes as good as something twice the price.
Focus your money on getting the right roast level and origin rather than chasing the most expensive beans. A $8/pound Brazilian dark roast will probably taste better in your percolator than a $20/pound Ethiopian light roast.
The Bottom Line
The best coffee for percolators isn’t necessarily the best coffee overall. It’s coffee that’s specifically suited to the brewing method. Dark roasts from low-acid regions, ground coarse and used fresh, will give you consistently good results.
Don’t let coffee snobbery convince you that you need expensive, exotic beans to make good percolated coffee. Some of the most satisfying cups I’ve made came from straightforward dark roasts that cost less than premium single-origins.
The key is understanding what percolation does to coffee and choosing beans that work with the process rather than against it. Master this, and you’ll be making percolated coffee that converts the skeptics.
Frequently Asked Questions
No, Keurig K-Cup pods are designed specifically for Keurig machines and won’t work in a percolator. You could technically cut open a pod and dump the grounds into your percolator basket, but the grind is too fine for percolation and the amount is only enough for a single cup. You’re much better off buying loose coffee in the correct coarse grind for your percolator.
Folgers Black Silk is actually a solid choice for percolators. It’s a dark roast with low acidity that holds up well to the longer extraction time. The classic red-can Folgers is a medium roast ground for drip machines, so it can taste a bit flat or over-extracted in a percolator. If you’re going with Folgers, stick to the Black Silk variety and consider using slightly less than you would in a drip machine.
A good starting point is one tablespoon of coarsely ground coffee per cup of water. Because percolators extract more aggressively than drip machines, you may find that you prefer slightly less coffee than you’d normally use. Start with one tablespoon per cup, then adjust up or down based on your taste. If the coffee tastes too strong or bitter, reduce the amount by half a tablespoon per cup on your next brew.
You should not reuse coffee grounds in a percolator. Percolation already extracts more from the grounds than most other brewing methods because the water cycles through them multiple times. By the time a percolation cycle is done, there’s very little good flavor left in the grounds. Running them through a second time will produce weak, bitter, and unpleasant coffee. Always start with fresh grounds for each batch.
Generally yes. Percolator coffee tends to have more caffeine than drip coffee because the water passes through the grounds multiple times, extracting more caffeine with each cycle. The higher water temperature in percolators also helps extract caffeine more efficiently. If you’re sensitive to caffeine, consider using less coffee per cup or shortening the percolation time to keep the caffeine content closer to what you’d get from a drip machine.
Percolator grind is noticeably coarser than drip grind. Drip grind looks like fine sand, while percolator grind should resemble coarse sea salt or rough breadcrumbs. The coarser grind is important because percolators cycle water through the grounds multiple times at higher temperatures. If the grind is too fine, you’ll end up with muddy, over-extracted, bitter coffee. If you’re buying pre-ground coffee, look for bags specifically labeled “coarse grind” or “percolator grind.”
Discussion