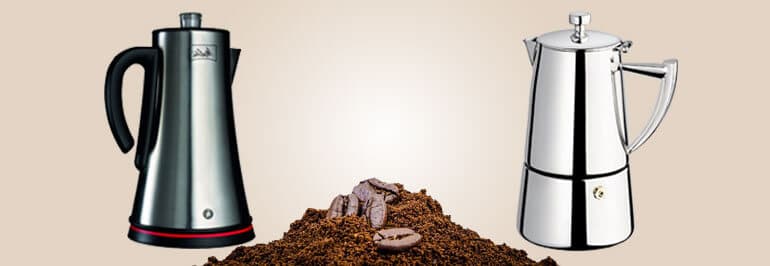
Let’s start with something that might make coffee snobs cringe. Nearly any coffee expert will tell you that a percolator is about the worst possible way to make coffee. Because the water is heated to a boil in order to perk, it’s really too hot for the coffee. It gets over extracted, and you end up with the bitterness and acidity that made coffee a “grownups only” drink back in the day.
But here’s the thing the experts don’t want to admit – sometimes they’re wrong.
I used to be one of those people who turned their nose up at percolated coffee. Pour-over this, French press that, anything but that ancient contraption bubbling away on the stove. Then I spent a weekend at a friend’s cabin where the only coffee maker was his grandmother’s old stovetop percolator. I was prepared for the worst. Instead, I had some of the most satisfying coffee I’d had in months. Rich, full-bodied, and it just worked. Made me realize the problem isn’t the percolator – it’s how people use it.
That said, there are still people who prefer perked coffee to any other kind. Taste is, after all, a matter of taste. And let’s be honest – those enormous coffee urns are still the best way to make lots and lots of coffee for a crowd. Try making coffee for 40 people with your precious pour-over setup and see how that goes.
Why Percolators Get a Bad Rap (And Why It’s Not Always Fair)
The reputation problem comes from decades of people doing it wrong. Too fine a grind, too much heat, too long on the burner – and yeah, you’re going to get bitter, over-extracted swill. But that’s not the percolator’s fault any more than a burnt steak is the grill’s fault.
The science behind it is actually pretty straightforward. In a percolator, boiling water gets forced up through a hollow stem, sprays over the coffee grounds, then filters back down through the grounds and into the pot below. The cycle repeats until you turn off the heat. Done right, this creates a strong, full-bodied coffee. Done wrong, and you’re basically boiling your coffee grounds into submission.
Most people’s percolator horror stories come from leaving the thing on the stove too long, using coffee ground fine enough for espresso, or both. It’s like judging all grilled food based on hockey pucks someone left on the barbecue and forgot about.
The Parts You Need to Know
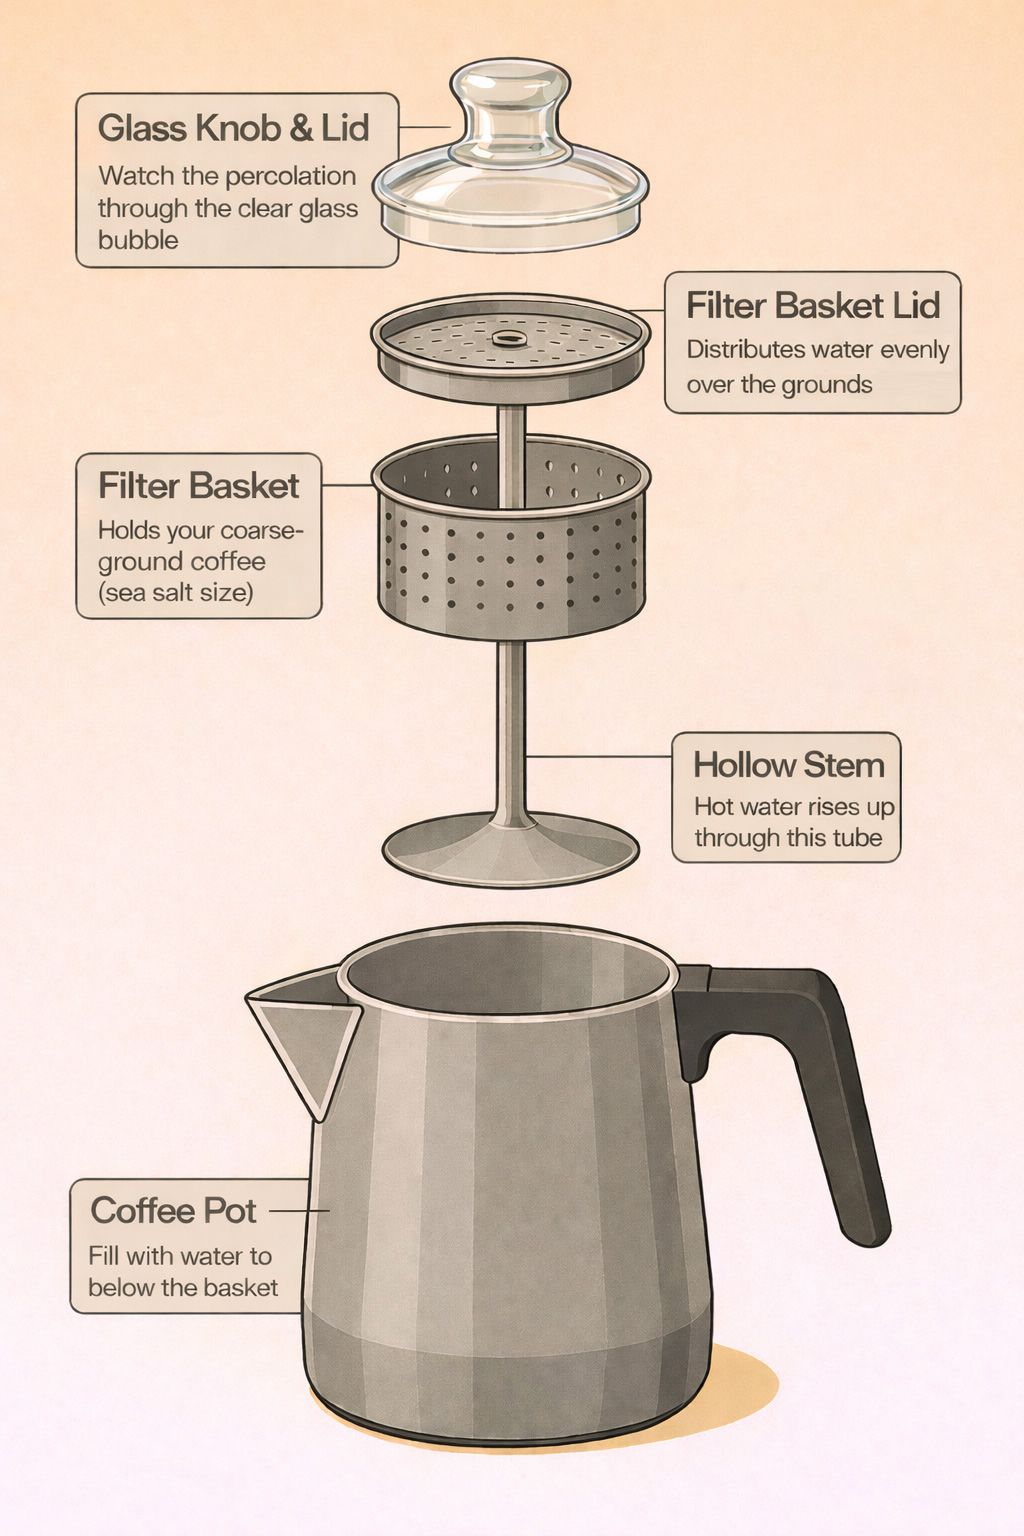
A coffee percolator has five main parts, and understanding each one helps you avoid the mistakes that give percolators their bad name.
There’s the percolator coffee pot itself, into which you put your water. There’s the stem, a hollow metal tube that fits into the bottom of the pot – in non-electric models, it has a flat round bottom that sits on the base. There’s the filter basket, which slides onto the tube and holds the ground coffee. There’s the filter basket cover, a round perforated lid that fits on top and makes sure the water showers the entire basket evenly. And finally, there’s the coffee pot lid, which often has a glass bubble in it.
That glass bubble just might be the most fun part of the entire contraption. It lets you watch the coffee splurting up from the tube and splashing inside before it spills back down onto the lid. Weirdly mesmerizing, like a little coffee fountain show happening right there on your stovetop.
Electric vs. Stovetop: Which Should You Choose?
Coffee percolators come in two distinct types – electric and stovetop. Each has its place, and honestly, both can make decent coffee despite their horrible reputation if you follow a few guidelines.
Electric percolators, including those coffee urns that can make up to forty cups at a time, are the set-it-and-forget-it option. They’re consistent, they shut off automatically, and they’re perfect for offices, church basements, and anywhere else you need to caffeinate a crowd without babysitting the process. The downside? You give up control over timing and temperature.
Stovetop percolators give you complete control, which is both a blessing and a curse. You can adjust the heat exactly how you want it, but you also have to pay attention or risk over-extraction. They’re great for camping since they don’t need electricity, and there’s something genuinely satisfying about the hands-on process. One of our readers pointed out they work differently at altitude too – at 5,300 feet, water boils at about 201 degrees, and percolators run roughly 10 degrees cooler than that, which actually makes the coffee come out better than at sea level. I thought that was fascinating.
How to Make Perfect Percolator Coffee
Here’s how to make percolator coffee that won’t make you question your life choices:
- Keep all parts of the percolator clean. This isn’t optional. Wash the entire thing with dishwashing liquid and hot water every single time you use it. Coffee oils go rancid faster than you’d think, and old residue will ruin even good coffee. Use a pipe cleaner for the inside of the stem. I learned this the hard way after wondering why my coffee tasted like the bottom of a week-old pot.
- Use freshly ground coffee – and make sure it’s coarse. This is where most people mess up. That pre-ground coffee from the grocery store? It’s ground for drip coffee makers and it’s too fine for percolators. You want a coarse grind, more like sea salt or coarse breadcrumbs. If you don’t have a grinder, look for coffee labeled as coarse grind, or ask your local coffee shop to grind it coarse for you. On a camping trip with no electricity? Carry your ground coffee in a vacuum container with a lid to keep the air out.
- Get your water level right. Disassemble the percolator and put the stem in place. Fill with water to below the line where the filter basket sits. Too much water and you’ll get weak coffee. Too little and it won’t perk properly.
- Don’t be stingy with the coffee. Put the filter basket on and add one heaping tablespoon of coffee for each cup of water. Some people go up to two tablespoons if they like it strong, but start with one and adjust from there. Put the basket lid in place.
- Start the heat. If you’re using an electric percolator, plug it in and turn it on – it’s on its own now. If you’re using a stovetop, put it over medium heat. Not high, not low – right in the middle.
- Watch for the magic moment. As soon as the first splurt of coffee hits that glass bubble, turn the heat down to low. This is crucial. You want just enough heat to keep percolation going, but not so much that you’re boiling your coffee. You’ll hear it change from rapid bubbling to a gentler, slower rhythm.
- Time it right. For most people, 4-8 minutes of perking is the sweet spot. Start checking at 4 minutes – the coffee coming up through the bubble should look like actual coffee, not weak tea. Don’t overthink it.
- Stop the process immediately. As soon as the pot stops perking or you decide it’s strong enough, pull it off the heat.
- Remove the filter stem – this is the step everyone skips. Carefully take off the lid and pull out the entire filter stem assembly, not just the basket. If you leave it in, steam from the coffee keeps condensing, dripping through the spent grounds, and making your coffee progressively more bitter. This is how perfectly good percolated coffee turns into undrinkable swill in about ten minutes.
- Let it rest, then enjoy. Give it about 30 seconds so any grounds that escaped can settle, then pour yourself a cup. You might be surprised by how good it actually is.
When Percolators Actually Shine
Despite what the coffee cognoscenti will tell you, there are situations where percolators are not just acceptable but actually the best choice.
Camping and outdoor adventures. Try bringing your French press on a camping trip and see how long it lasts. Percolators are practically indestructible, work on any heat source, and make coffee strong enough to get you moving after sleeping on the ground.
Large groups and events. Need coffee for 20, 30, or 50 people? A large electric percolator urn beats making pot after pot with any other method. They keep coffee warm for hours without that burnt taste you get from drip makers with hot plates.
The ritual of it. Sometimes the process matters as much as the product. There’s something deeply satisfying about the sound of a percolator bubbling away, the anticipation as you watch that glass bubble, the ritual of removing the basket at just the right moment. It connects you to decades of coffee drinkers who found comfort in exactly the same process.
Troubleshooting Common Percolator Problems
My coffee tastes bitter and terrible. Nine times out of ten, you’re using too fine a grind, perking too long, or both. Try a coarser grind and shorter brewing time. And make sure you’re removing that filter basket immediately when done.
My coffee is weak and watery. Not enough grounds, or the grind is too coarse and water’s flowing through too quickly. Try adding more coffee first, then adjust grind size if needed.
My percolator won’t start perking. Check that the stem is seated properly and the water level is right. It can take 5-10 minutes to get going, especially with electric models. Be patient.
The coffee is muddy and full of grounds. Your grind is definitely too fine. You want pieces about the size of coarse sea salt, not coffee dust.
Best Coffee Beans and Grinds for Percolators
Not all coffee works equally well in a percolator. Medium to dark roasts are your best bet because they’re less acidic and more forgiving of the longer extraction time. Brazilian, Sumatran, and other low-altitude coffees tend to be naturally lower in acid, which plays nicely with percolation.
French roast and Italian roast are particularly good choices. The roasting process has already broken down some of the compounds that turn bitter with extended brewing, and the bold flavors hold up well against the strong extraction.
For grind size – think coarse, then go a little coarser. If you’re grinding your own, aim for something that looks like coarse breadcrumbs or sea salt. Too fine and you get muddy, over-extracted coffee. Too coarse and the water flows through without pulling enough flavor.
The Bottom Line
I’m not going to pretend that percolated coffee is better than a well-executed pour-over or a properly pulled espresso shot. But it’s also not the coffee catastrophe that the experts make it out to be. Made properly – right grind, proper timing, remove the basket – percolator coffee is rich, full-bodied, and satisfying in ways my pour-over never quite manages.
The real problem isn’t the percolator. It’s people who don’t know how to use one. Master the technique, use good coffee ground to the right size, pay attention to timing, and you might find yourself reaching for the percolator more often than you’d ever admit in polite coffee company.
After all, our grandparents drank percolated coffee for decades. They weren’t wrong about everything.
Frequently Asked Questions About Percolator Coffee
Not if you do it right. The bad reputation comes from over-extraction – too fine a grind, perking too long, or forgetting to remove the filter basket after brewing. Follow proper technique and you might be genuinely surprised by how good it can be.
4-8 minutes depending on how strong you like it. Start checking at 4 minutes and taste-test. The coffee coming up through the glass bubble should look like actual coffee, not weak tea. Stop before it gets too dark or you’ll end up with bitter brew.
Coarse grind, like sea salt or coarse breadcrumbs. Fine grinds will give you muddy, bitter coffee that’s impossible to enjoy. If you’re buying pre-ground, look specifically for “coarse grind” or ask your coffee shop to grind it coarse for percolators.
Usually over-extraction from perking too long, grind that’s too fine, or water that’s too hot. Try shorter brew time, coarser grind, and lower heat once percolation starts. And make sure you’re removing the entire filter stem immediately when brewing is done – not just the basket.
Most store-bought ground coffee is too fine for percolators. It’s ground for drip coffee makers and will give you muddy, over-extracted results. Look for coffee specifically labeled as coarse grind, or better yet, grind your own beans.
Start with 1 heaping tablespoon per cup of water. If you like it stronger, go up to 2 tablespoons per cup – but don’t just brew longer to get more strength. That’s how you get bitterness. More grounds, not more time.
Yes, immediately. This is the step most people skip, and it makes all the difference. Remove the entire filter stem assembly, not just the basket. If you leave it in, steam keeps condensing and dripping through the spent grounds, turning your coffee bitter within minutes.
Electric is more convenient and consistent, plus it shuts off automatically. Stovetop gives you more control over heat and timing, and works great for camping. Both can make good coffee with proper technique. It really comes down to how hands-on you want to be.
Check that the stem is properly seated in the bottom of the pot and the water level is correct – it should be below where the filter basket sits. Be patient too. It can take 5-10 minutes for the water to heat up enough, especially with electric models.
Use fewer grounds rather than reducing brew time too much. If you cut brewing time too short, you’ll get weak, sour coffee instead. You can also dilute strong percolated coffee with hot water after brewing – think of it like making an Americano.
Wash all parts with hot soapy water after every use. Use a pipe cleaner or long thin brush for inside the stem – coffee oils build up in there and will make your next pot taste rancid. Once a month, run a cycle with white vinegar and water for a deep clean.
Let the water heat until it just starts to perk, then immediately drop the heat to low. You want hot enough to percolate but not a rolling boil. The percolation should be gentle and steady, not violent bubbling.
Use more coffee grounds rather than longer brew time. A darker roast also gives more intense flavor without extra bitterness. Some people swear by adding a tiny pinch of salt to cut bitter notes, though that’s definitely a personal preference thing.
Interestingly, many people with coffee-related heartburn actually find percolated coffee easier on their stomachs than drip. The longer brewing process and higher heat can break down some of the acids that cause problems. Dark roasted beans help even more with this.
Drop them in the comments below. With over 500 comments from fellow percolator users, our community has probably faced your exact issue before – and there’s always someone willing to share their hard-earned wisdom.
584 Comments