If you’ve been drinking coffee for any length of time, you’ve probab...
Roasting your own coffee at home is fast becoming a popular hobby, but it’s still out there on the fanatic fringe. Despite the fact that it was commonplace to roast green coffee beans at home no more than fifty years ago, these days it’s looked at as being slightly lunatic and decidedly eccentric. If you decide that you want to try roasting your own coffee at home, there are a few basics you should know before you make the attempt.

How to acquire green coffee beans
Somewhere in the US, there may be a market where they sell green coffee beans for home roasting. I haven’t found it yet. Even the most basic back-to-basics natural foods stores that I’ve visited only carry roasted beans. Your best source for green coffee beans is the Internet. There are many specialty roasters who sell green coffee beans to consumers in 1 to 5 pound bags.
Your next best option is to find a local roaster, call and inquire about buying green beans in small batches. Most will be quite happy to oblige once you explain that you want to try roasting your own coffee at home, and many will even part with tips and roasting advice, or suggest particular blends and varietals that are suitable for home roasting.
Finally, look for a local coffee enthusiasts club or a home roasting club in your area. You’ll get the benefit of having kindred souls with more experience to offer you advice and share resources with you.
The home coffee roasting equipment primer
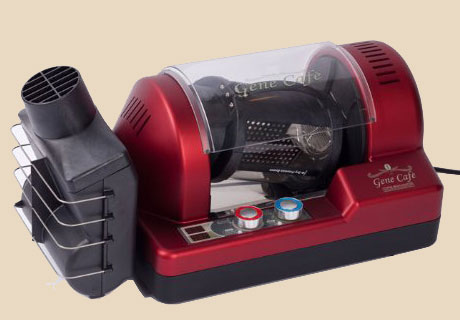
There are a number of coffee roasters on the market ranging in price from about $45 to around $500. There are many alternatives to using a dedicated coffee roaster, and one of those may serve you better for your first forays into the art of home coffee roasting.
The two most commonly used “first” home coffee roasting methods are with a hot air electric corn popper or with a stove top hot corn popper, either of which can be bought for about $25. You can also try home coffee roasting with a flat bottomed cast iron pan or with a flat pan in the oven. Finally, some home coffee roasting mavens swear by roasting coffee with a heat gun.
In addition to a roasting pan, if you’re using a cast iron pan on stovetop, you’ll need something to stir or agitate the coffee, and you REALLY should be using a ventilator fan. Roasting coffee is smoky business, and the darker you roast, the more smoke there will be.
A thermometer may be helpful in determining the right stage of roasting to start the cool down process.
Judging degree of roasting
The most common method of judging the degree of roasting in home coffee roasting is by color. As green coffee beans roast, they change color from green to pale tan, and then darken through cinnamon, light brown, medium brown, dark brown and almost black. The Specialty Coffee Association of America offers a kit with colored circles that you can compare to your coffee beans to judge the relative darkness of your roast. You can also invest in an Agtron spectrometer to analyze the color of your coffee, though that’s quite expensive for a home roaster.
The second method of judging home coffee roasting is by audible cues. During roasting, coffee reaches two audible ‘crack’ stages. First crack corresponds to the lightest roasts. The second crack signals the start of the darker coffee roasts, and coffee can go from American roast (fairly light) to dark Italian roast (just before burnt) in as little as two minutes. An experienced home coffee roaster can judge the degree of the roast by how active the second crack stage is.
Cooling Down the Coffee Beans
Coffee beans will continue to roast after you’ve removed them from the heat source. In order to keep them from overcooking and burning, you need to cool them down fast. A dedicated roaster – a machine made specifically for roasting coffee beans – will make this easy. If, however, you’ve chosen one of the easy DIY home coffee roasting methods, you’re on your own for cooling the beans down fast and stopping the roasting process. The easiest way to cool the roasted coffee beans is also the most effective.
Have two metal colanders or bowls at the ready. I recommend colanders because they have handles. As soon as the coffee beans reach the proper roast, dump the entire pot into the first colander. Get the hot, empty pan out of the way safely so that you can dump the coffee beans back and forth between the two colanders several times to allow the air to cool them.
You can use a light mist spray bottle to mist the hot beans with water while you stir them in a flat bottomed pan. Or, you can dump the entire pot of roasted coffee beans into a flat-bottomed pan and stir/toss them with a wooden spoon. The main idea is to keep the beans in motion and expose them to the cooler air as much as possible to facilitate heat transfer. Or, less scientifically, shake the things up and down to cool them off faster.
Storing your home roasted coffee
Home coffee roasting will allow you to have the freshest possible coffee available to you any time you want it. A few experts believe that coffee is at its best almost immediately, but the more traditional school of thought on this is that home roasted coffee is at its best about 12-48 hours after roasting. Once cooled, store your roasted coffee beans in an airtight, opaque jar until you are ready to brew it, and only grind enough for a single pot at a time.
Some posts on our site may contain amazon affiliate links. We may earn affiliate commission from amazon when you purchase through those links.
Leave a Reply