
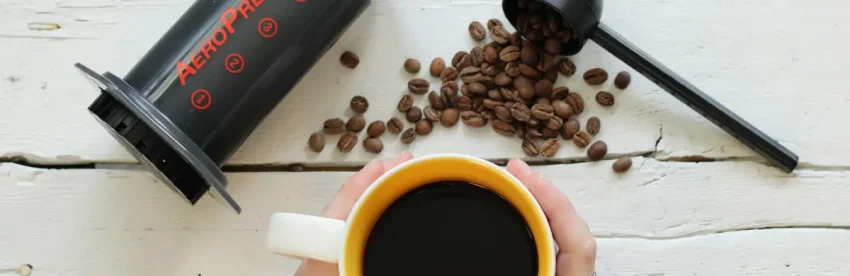
The AeroPress is the only piece of coffee gear I own that I have never once considered upgrading. It costs about $40, it is made of plastic, it looks like a large syringe, and it has outlasted three grinders and at least two espresso machines in my kitchen.
It also gets described wrongly almost everywhere, including on this site until now. It is not an espresso maker. It is not really a French press either, though the marketing has leaned on that comparison since 2005. It is its own thing, and once you understand what it actually does, you stop fighting it and start getting very good coffee out of it.
What the AeroPress actually is
Alan Adler, an engineer who taught at Stanford and invented the Aerobie flying ring, designed it in 2005 because he wanted one good cup of coffee without brewing a whole pot. That origin explains the whole device. It is built for one cup, made quickly, with almost no cleanup.
Mechanically it is an immersion brewer with a pressure-assisted finish. Coffee steeps in water like a French press, then you push it through a filter with hand pressure. That push generates somewhere in the region of half a bar. Espresso runs at 9 bars, so the gap is not small. Anyone selling you the AeroPress as an espresso machine is stretching the truth by about eighteen times.
What the pressure does give you is speed and clarity. Because the water is only in contact with the grounds for a minute or so, you can use a finer grind without the bitterness that would normally bring, and the paper filter takes out the sediment that makes French press coffee heavy. You end up with something closer to a very clean, concentrated pour-over.
The standard method
This is the method printed on the box, and it works. Do not skip past it just because the internet has opinions.
Rinse a paper filter and drop it in the cap. Twist the cap onto the chamber. Stand the chamber on a sturdy mug. Add about 15 g of coffee, which is roughly 2 tablespoons if you are not weighing, ground a little finer than you would for drip.
Pour in 8 oz (240 ml) of water at about 175 F (80 C). Yes, that is cooler than you use for anything else. Adler chose it deliberately, and it is the single most ignored instruction on the box.
Stir for 10 seconds. Insert the plunger and press down slowly, taking 20 to 30 seconds to reach the bottom. Stop when you hear the hiss. That is it, start to finish, in about a minute and a half.
The inverted method, and whether you need it
The inverted method assembles the AeroPress upside down, so the plunger is at the bottom and nothing drips through while the coffee steeps. You add coffee and water, let it sit for a minute or two, then screw on the cap, flip the whole thing onto your mug and press.
The advantage is real: you control steep time exactly, with no slow leak through the filter while you wait. The disadvantage is that you are flipping a chamber of near-boiling water over a mug, and I have met the consequences of getting that wrong.
My honest take after years of both: the inverted method is worth learning if you like longer steeps or you are chasing a specific recipe. For a daily cup it is a lot of ceremony for a small gain. Start standard. Move to inverted when you have a reason.
Grind size, and the plunger test
Aim between table salt and fine sand. Finer than drip, noticeably coarser than espresso.
Here is the useful part, and it is the thing nobody tells you. The plunger tells you if your grind is wrong. If pressing takes real force and your hand is shaking by the end, your grind is too fine and the filter is choking. If the plunger drops under its own weight in five seconds, it is too coarse and you are under-extracting.
A slow, steady press that takes 20 to 30 seconds of gentle pressure is the target. Old reviews of the AeroPress often complained it was hard to press and warned people with weak hands away from it. That is almost always a grind problem being blamed on the device. Our guide to matching grind to brewing method covers the wider picture.
Water temperature
The official 175 F (80 C) surprises people who have been told hotter is better. It works because the AeroPress already extracts aggressively through immersion plus pressure. Add boiling water on top of that and you pull out the bitter compounds you were trying to avoid.
In practice, anywhere from 175 to 185 F (80 to 85 C) is a sensible working range, and lighter roasts tolerate the higher end better than dark ones. If you have no thermometer, boil the kettle and wait about a minute, or pour into a cold mug first and then into the chamber.
Paper or metal filter
The paper microfilters are the default and they are the reason AeroPress coffee tastes so clean. They trap oils and fines. A pack lasts most people a year, and you can rinse and reuse one several times if you want.
Metal filters give you more body and more oils, closer to a French press in mouthfeel, at the cost of a little sediment. Neither is wrong. If you like your coffee heavier, buy a metal one for $10 and try it for a week. We go deeper into what filters do to flavor in our piece on whether coffee filters make a difference.
Common mistakes
Water too hot. The most common one by far, and it makes the coffee taste harsh in a way people usually blame on the beans.
Pressing too hard, too fast. You are not trying to force it. If it needs force, the grind is the problem.
Skipping the filter rinse. A dry paper filter puts a papery note in the first mouthful. Two seconds of hot water fixes it.
Treating the output as a full cup. The standard recipe makes a concentrate. Most people should be topping it up with hot water to make an Americano-style cup, and a lot of first-time disappointment is really just coffee that was never diluted.
Cleaning, which is the actual selling point
Unscrew the cap over a bin, push the plunger the last inch, and the puck and filter eject in one piece. Rinse the seal. Done in about ten seconds, with no grounds in your sink trap.
That is not a small thing. It is the reason the AeroPress survives in kitchens where more impressive gear ends up in a cupboard. The rubber seal will stiffen after a few years of heavy use and replacements cost a few dollars.
Why it travels better than anything else
It is plastic, it weighs about a pound (450 g), and there is nothing on it to break. No glass, no electronics, no valve to clog. If you can get hot water you can make good coffee, which makes it the obvious choice for camping, hotel rooms and offices with grim kitchen facilities.
The AeroPress Go packs into its own mug and is worth the extra if you travel often. If you mostly brew at home, the original is cheaper and holds slightly more.
Frequently asked questions
Does the AeroPress make real espresso?
No. It generates roughly half a bar of pressure against espresso’s 9, so it cannot build true crema or produce a genuine shot. What it makes is a strong, clean concentrate that works well in milk drinks and as an Americano base. If you want actual espresso on a budget, see our roundup of budget espresso makers under $200.
AeroPress or French press?
French press for body, oils and brewing several cups at once. AeroPress for a clean single cup in 90 seconds with no sediment and almost no cleanup. They are not really competitors. I own both and use them for different mornings. Our French press guide covers that side properly, and our full brew method comparison puts all six side by side if you’re still weighing options.
How long does an AeroPress last?
Years. The chamber and plunger are effectively indestructible in normal use. The rubber seal is the only wearing part, and it is cheap and replaceable. This is not a device you replace, which is unusual for anything at this price.
Can you make cold brew in it?
You can make something like it. Use cool water and a longer steep, generally 12 to 24 hours in the fridge using the inverted method, though the small chamber limits your yield. For proper batches see how to cold brew coffee.
If you have had an AeroPress sitting in a drawer since someone gave you one, pull it out and try it at 175 F with a finer grind than feels right. That combination is what changed my mind about the thing, roughly fifteen years after I first dismissed it as a gimmick.
Discussion 1
I bought a Aeropress Coffee and Espresso makers for my brother who raved about it so much I purchased one for myself soon afterward. It is GREAT. Also cheap and will work in any national emergency as all you need is heated water and coffee.